
Man, let me tell you something about this damn jersey. It isn’t just a shirt you wear to the pub; it’s the official, authentic, $150+ piece of history. The one with the proper gold patch and everything. I waited five months for mine to arrive after the final whistle blew. Five months! You think I’m going to risk that perfection just because I got sweat and maybe a little bit of questionable viewing-party chili on it?
No way. But here’s the thing: washing these kits is scary. The heat press logos, the vinyl numbers—they crack, they peel, they bleed if you look at them wrong. People always ask me, “How do you keep your kits looking pristine?” They think I’m some kind of laundry wizard. Truth is, I just messed up so badly once that I had to figure out the only way to do it right.
The Disaster That Taught Me Everything
See, I wasn’t always this careful. Back in the day, when I got my first really nice jersey—a classic retro number—I was arrogant. I read the tag: “Machine wash cold, gentle cycle.” So, I tossed it in with my socks and my bath towels. I figured, hey, that’s what the tag says, right? Worst mistake of my life.
When I pulled that jersey out of the machine, I swear the numbers looked like they had been through a paper shredder. The edges were fraying, the plastic material had gone soft and sticky, and the bright white collar now had a slight gray tint from some unknown item in the load. I hung it up, and when it dried, the number 10 was cracked right across the middle. I paid good money for that, and I ruined it in 45 minutes of mechanical violence.
I was so furious, I actually threw the whole washing machine cover off and didn’t talk to my wife for an hour. Okay, maybe two hours. She just laughed and said, “Next time, you wash the fancy clothes yourself.” She was right. That incident—that pure, unnecessary destruction of a perfectly good kit—is why I know exactly how to wash the new Messi Argentina shirt now.
My No-Risk, Hands-On Practice Record
Forget the washing machine completely. Seriously. It’s a tool for destroying synthetic fabric and adhesives. You have to go hands-on. Here is the exact process I developed and implemented when I had to deal with a few sweat stains after a particularly tense match day.
Step 1: Prep the Battlefield
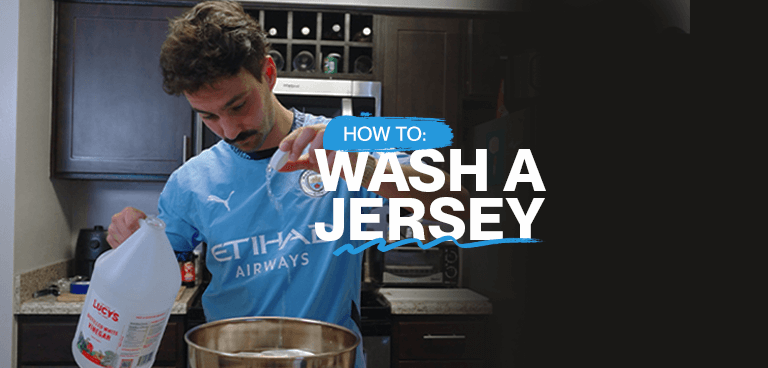
First thing I grabbed was a clean, plastic wash basin. You can use your bathtub, but I prefer a small tub because it lets me control the water level perfectly. Next, I found my laundry soap. This is crucial: don’t use harsh detergents with bleach or heavy perfumes. You need something mild. I use those gentle soaps designed for baby clothes or delicate fabrics. Nothing else. Absolutely zero fabric softener. That stuff clogs the fibers and messes up the wicking ability.
Step 2: Go Cold and Submerge
I turned on the tap, ensuring the water was straight cold. If the water is even slightly warm, you risk activating the adhesive under the names and numbers, which makes them peel or crack later. I filled the basin just enough to cover the shirt completely. Then, I squirted in about a tablespoon of the gentle liquid soap. Swish it around to dissolve it well.
I flipped the jersey inside out. This is mandatory. You want the numbers and badges protected against friction. Turning it inside out ensures that if you rub anything, you’re rubbing the plain inner lining, not the expensive vinyl on the outside. I eased the jersey into the water, ensuring it was fully submerged.
Step 3: The Soak and Gentle Agitation
This is where patience comes in. I let it soak for about 30 to 45 minutes. Not hours, just long enough for the cold water and mild soap to start lifting the dirt and sweat. After the soak time was up, I began the manual wash. I used my hands to gently compress and squeeze the fabric. I didn’t scrub. I didn’t wring it out like a dishcloth. I just gently pushed the soapy water through the material, focusing on the collar and underarms where the sweat builds up.
- I targeted sweat stains by gently rubbing the fabric against itself, inner layer to inner layer.
- I inspected the emblems to make sure I wasn’t applying pressure directly to the heat-pressed patches.
- I continued to compress and release for about five minutes until I felt the fabric was clean.
Step 4: Rinsing Until Clear
Once I was satisfied, I drained the dirty water. Man, seeing that murky water always proves this method works. Then, I refilled the basin with fresh, cold water. I rinsed the jersey multiple times, maybe three or four rounds, until the water running off the fabric was completely clear and there were zero soap bubbles left. Any leftover soap will harden the fibers and attract dirt faster later.

Step 5: The Drying Process
Do NOT even look at the dryer. That heat will destroy the vinyl faster than a badger chewing through wiring. I gently picked up the wet shirt and pressed it against the side of the tub to let most of the water drip off. Again, no aggressive wringing. Then, I grabbed a dry towel and laid the jersey flat on it. I rolled the towel up, pressing firmly to absorb the remaining excess moisture.
Finally, I hung the jersey up. I used a thick plastic hanger, not a wire one that can leave marks. I found the coolest, airiest spot in my laundry room—never in direct sunlight, because UV rays fade the colors and dry out the adhesives. I left it to air-dry completely, which usually takes about 10 to 12 hours.
When I went back and took it off the hanger, it was perfect. Clean, fresh, smelling only of clean air, and most importantly: the Messi 10 on the back looked exactly the way it did when I first ripped open the shipping box. No peeling, no cracking, no fading. It takes longer than throwing it in the machine, sure, but I’ve kept my most treasured shirts looking brand new for years using this exact process. Don’t risk your history for a few minutes of convenience. Trust me on this one.