
The Case of the Sagging Kitchen Drawer
Man, I hate it when things don’t work right. It’s not just the inconvenience; it’s the constant little reminder every single time you open that drawer that something is broken. You know the feeling? That stiff pull, the scrape, the sudden drop when the drawer finally clears the frame? It started happening to my main utensil drawer in the kitchen a few months back. I kept telling myself I’d get to it, but who wants to spend Saturday morning fighting with old cabinet hardware?
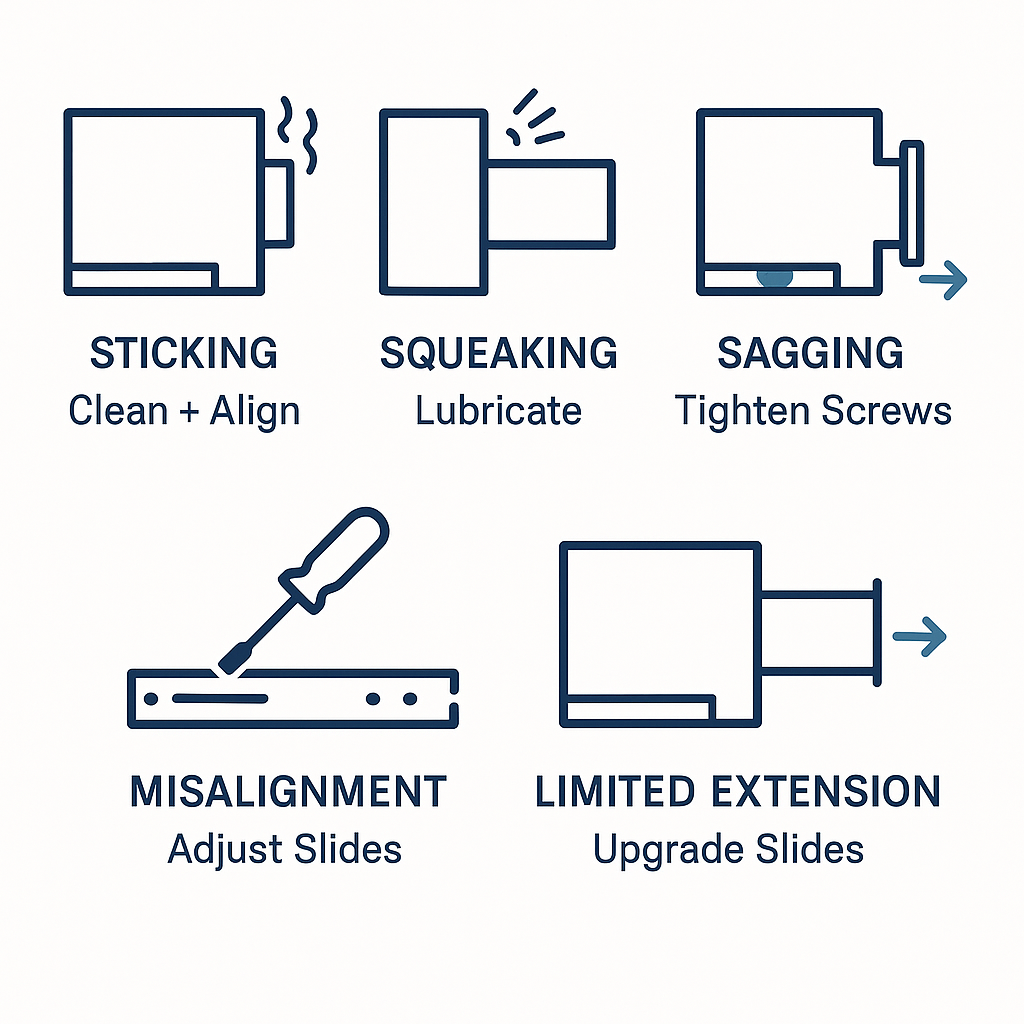
I finally hit my breaking point last week. I was trying to grab a measuring cup in a hurry, yanked the drawer open, and the whole thing seized up, tilted sideways, and nearly dumped everything onto the floor. That was it. Time to figure out why the whole darn thing was acting like it was held together with spit and glue.
Step One: Ignoring the Panic and Diagnosing the Problem
My first reaction, honestly, was to think the entire slide rail system was shot. Maybe the little ball bearings had busted out, or the metal itself was warped. That’s what they want you to think, right? So you go out and buy a brand-new $30 set of drawer slides that you don’t actually need.
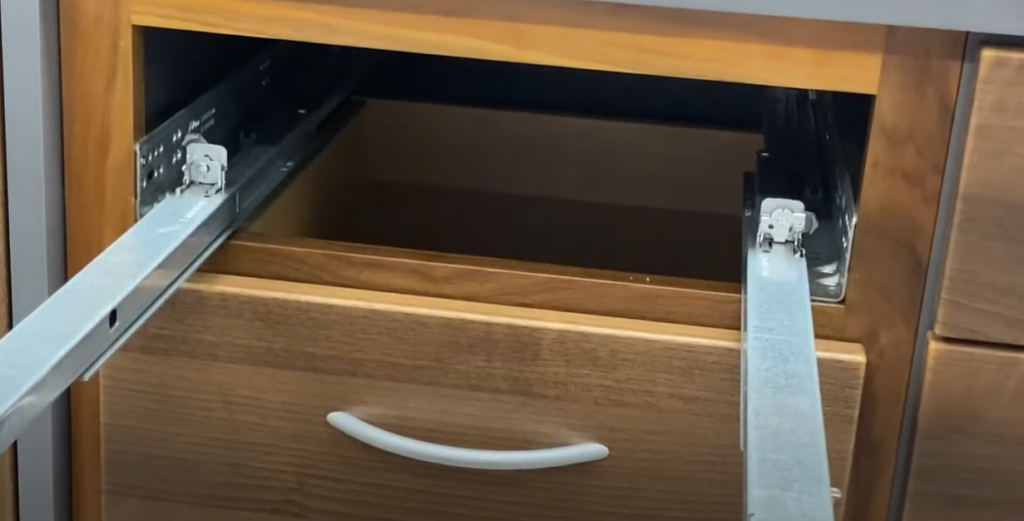
I pulled the drawer completely out of the cabinet. Getting it out was a fight because of the misalignment. Once it was free, I laid it on the counter and looked into the cabinet cavity. The drawer slides themselves—the metal tracks—were fine. The wheels were rolling. The issue wasn’t the slide track; it was how the track was fixed to the cabinet wall.
The tracks are held in place by brackets. Usually, there’s a bracket screwed into the front face frame and a bigger bracket screwed into the back wall of the cabinet. Guess where the problem was? Yeah, the back end. That’s where all the weight leverages and vibrates, especially when you slam the drawer shut or overload it with heavy stuff like canned goods or, in my case, 50 pounds of rusty wrenches I accidentally left in the utensil drawer (just kidding, but you get the idea).
I looked closely at the rear bracket on the left side. The screws were clearly loose. Not just finger-loose, but they had wiggled around enough that the bracket had actually slipped maybe three or four millimeters down. That small drop was enough to cause the whole drawer to sag and scrape against the bottom of the opening. The screw holes in the cabinet wood were slightly elongated now—a sign of repeated stress and movement.
Step Two: The Simple Tool Retrieval and Initial Tightening Attempt
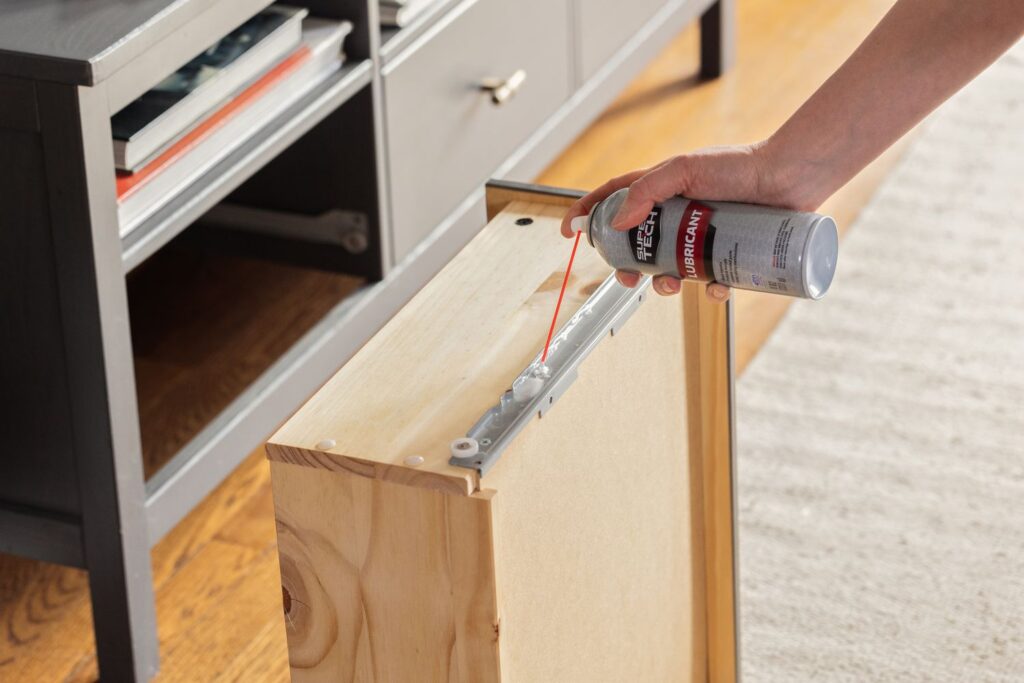
I grabbed the basic stuff: my drill with a Phillips head bit, and a few different sizes of slightly longer wood screws, just in case the old ones were stripped beyond usefulness. Sometimes a little extra length makes up for years of stripped-out particle board.
I went for the easiest fix first: just tighten the existing screws. I aimed the drill and cranked them down. They went in easily, but the bracket didn’t move back up. Why? Because the bracket was already sitting in the sagged position, and I was just tightening the screw into the bottom of the now-oval hole. If I left it like that, the drawer would still sag, just with tighter screws.
Step Three: The Crucial Realignment Adjustment
This is the part everyone misses, and it’s the key to making this repair last. You can’t just tighten; you have to reposition.
I loosened the screws on the offending bracket again, just enough so I could move it by hand. Then, I needed to figure out where it was supposed to be. I looked over at the right-side bracket, which was still tight and level. I grabbed my cheap little tape measure and measured the height of the right bracket from the cabinet floor up to the top edge of the slide track. Let’s say it was 120 millimeters.
I went back to the saggy left side. I held the bracket up with one hand, forcing it back up to that 120mm mark. Now, this is tricky because you are fighting the natural tendency of the bracket to sit in the worn-out spot. I had to hold the bracket firmly in the correct position while I drove the screws back in with the drill in the other hand. I didn’t blast them in; I did it slowly, making sure the screws bit into fresh wood just above the old, worn-out channel.
I actually used slightly fatter screws than the originals for this, just to ensure they gripped the wood properly and didn’t slip back into the old hole. This time, when the screws were tight, the bracket was perfectly level with the other side. Victory!
Step Four: Putting It All Back Together and Testing
Once the rear brackets were tight and level, I checked the front brackets too, just for good measure. They were fine, but I gave them a half-turn of the screwdriver anyway. Never hurts.
I then carefully lifted the utensil drawer and slid the rollers back into the tracks. The moment of truth. I pushed it in. Smooth as butter. I pulled it out. Perfect alignment. No scraping, no seizing, no drop. The satisfying click when it locks into the open position was back.
It’s crazy how such a minor fix—literally just repositioning a metal plate by three millimeters—can completely restore the function of a whole piece of furniture. We spend so much time overthinking these hardware problems, ready to replace everything, when often, the simple physics of weight and gravity just cause the existing fittings to wiggle loose over time. A quick tightening, a crucial realignment, and you’re back in business. Don’t overlook the obvious stuff, folks. Sometimes the simplest adjustment is the strongest solution.